


Donations
Welcome!


|
Ad-Free 4ever Donations Welcome! |
| Resident Evil 2 (Platinum Edition) / Claire A Scenario 1 Six Saves Speedrun for Unlimited Ammo Rocket Launcher | |||||||
|
~ RESIDENT EVIL 2 ~
(Platinum Edition)
This speedrun guide has been tweaked based partially off MKim's Claire Scenario 1 Speed Guide hosted on GameFAQs. The main goal of this guide is to help the reasonably experienced RE2 gamer get the coveted Unlimited Ammo Rocket Launcher plus a bonus "A" Ranking under 2 hours with a maximum of 6 Saves! This has been tested and retested with the changes to make sure it's viable (with decent room for error. e.g. zombie grabs and bites, wrong turns, forgetting to pause). Hence, being an advanced player to use this guide is not a prerequisite. KNOWING THE GAME IS! Obviously this is NOT for first-timers, and will assume that you have done a long playthrough of Claire A Scenario 1 at least once to get a feel and an idea of where things are. In short, if you are struggling to find where the items are, and/or you can't make heads or tails what the guide is referencing, then this guide is NOT for you... yet! I have also taken the liberty to rename some rooms in the maps, and I have chosen NOT to bypass some creatures in the game (I don't like things in my way!). Feel free to bypass any at your leisure, but always remember the main goal of this guide - to help you get the Rocket Launcher (NOT the best speedrun time!). Trying to bypass some dogs (and fail) or getting swarmed by zombies just to save some ammo and then dying is not worth it, unless you don't mind reloading a saved game.Also, take note of the following conditions which MUST BE MET for this endeavour to succeed:
a. MAXIMUM OF 6 SAVES
b. NO USING HEALTH SPRAYS. c. NO TOUCHING SPECIAL WEAPONS (weapons that take up 2 squares in your pack, except the gifted Rocket Launcher near the end). d. NO USING WEAPONS WITH UNLIMITED AMMO (you will mainly be limited to the Hand Gun and Grenade Launcher for the most part). e. NO TOUCHING THE MAC11 (if you came across it, you are in the WRONG ROOM!!! What are you doing?!?!?!). Basically, just follow the guide to the letter, and you'll be fine. Remember, the PAUSE KEY / F1 is your best friend as you will be making extensive use of it. Are you ready? Let's go. G / 1. Navigate area to Police Station. Take *ALL* Hand Gun Bullets if possible. Police Station 1st Floor (Pt 1)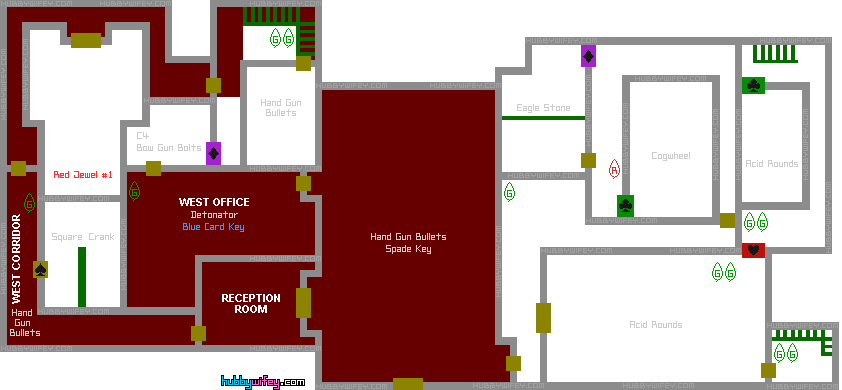 4. Go Reception Desk in Main Hall. Take Hand Gun Bullets. Use computer. 5. Go Reception Room. Ditch knife. 6. Go West Corridor. Take Hand Gun Bullets from corpse. Bypass Licker. 7. Go upstairs to Statues Corner. Kill zombies outside Darkroom corridor on the way. Police Station 2nd Floor (Pt 1)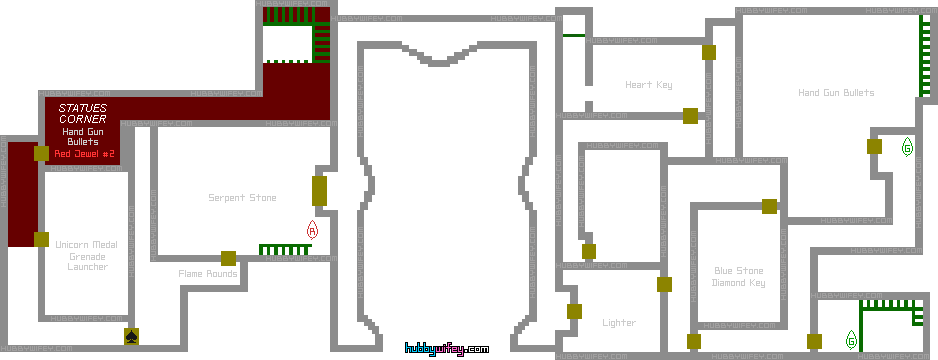 9. Go into S.T.A.R.S. Office. Take Grenade Launcher and Unicorn Medal. Police Station 1st Floor (Pt 2)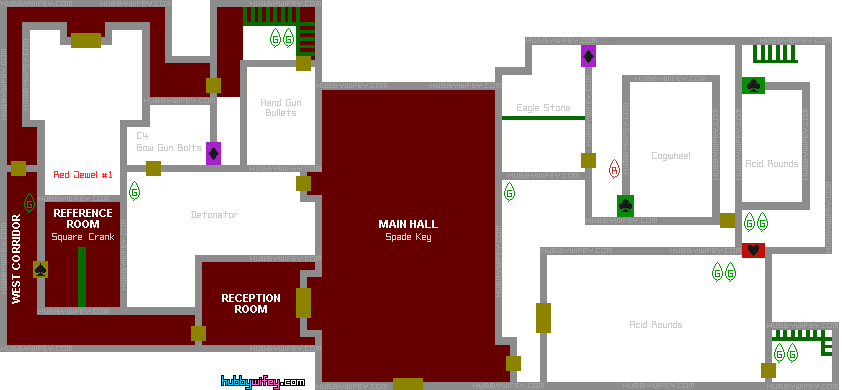 10. Backtrack to Reception Room. At West Corridor, kill Licker and take 1 G.
Equip *only*:
a. HAND GUN + BULLETS b. UNICORN MEDAL 12. Go Main Hall. Use Unicorn Medal. Take Spade Key. Police Station 2nd Floor (Pt 2)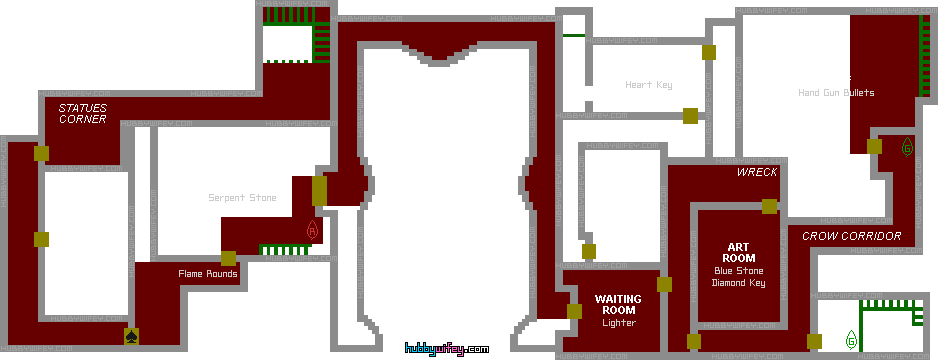 16. Inside Library, take 1 R. Exit to Balcony. 17. Go Waiting Room. Activate Emergency Ladder on the way but don't go down. Kill zombies in the way. 18. In Waiting Room, take Lighter.
Equip *only*:
a. HAND GUN + BULLETS b. LIGHTER 19. Go past Crow Corridor to the Roof. Ignore zombies and crows. Police Station 1st Floor (Pt 3)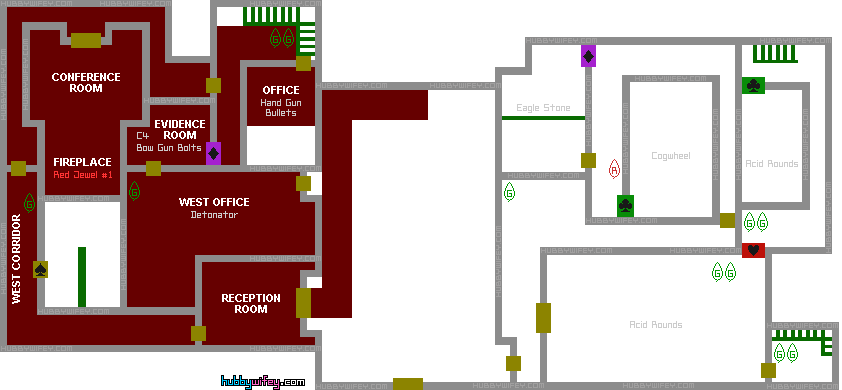 25. Head to Conference Room, then Fireplace. Light up painting. Take Red Jewel #1.
Equip *only*:
a. HAND GUN + BULLETS b. BOW GUN c. DIAMOND KEY 27. Exit Darkroom Office and take 2 Gs outside. Combine to save space. Police Station 2nd Floor (Pt 3)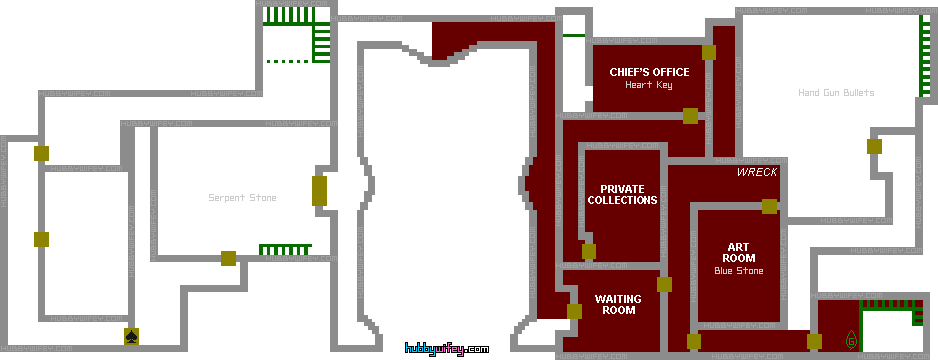
Equip *only*:
a. HAND GUN + BULLETS b. BOW GUN + BOLTS c. BOMB & DETONATOR COMBINED d. 2 RED JEWELS 33. Go Art Room. Use the Red Jewels and take Blue Stone. Exit. Police Station 1st Floor (Pt 4)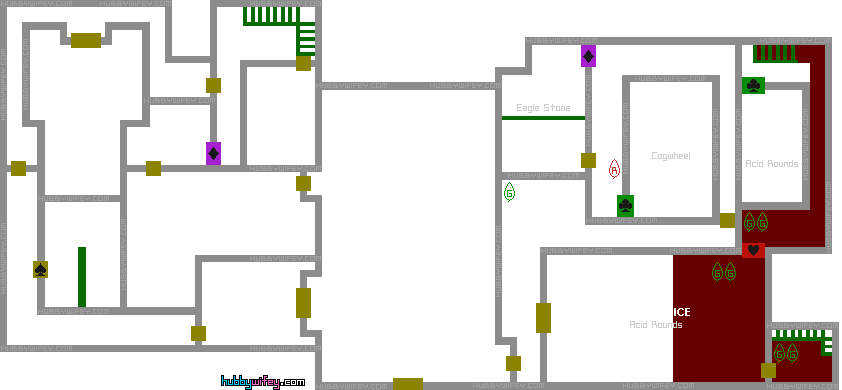 39. Go East Office. Kill zombies. Take Acid Rounds (Safe Combo: 2236). 40. Exit East Office and onward to Basement. Basement (Pt 1)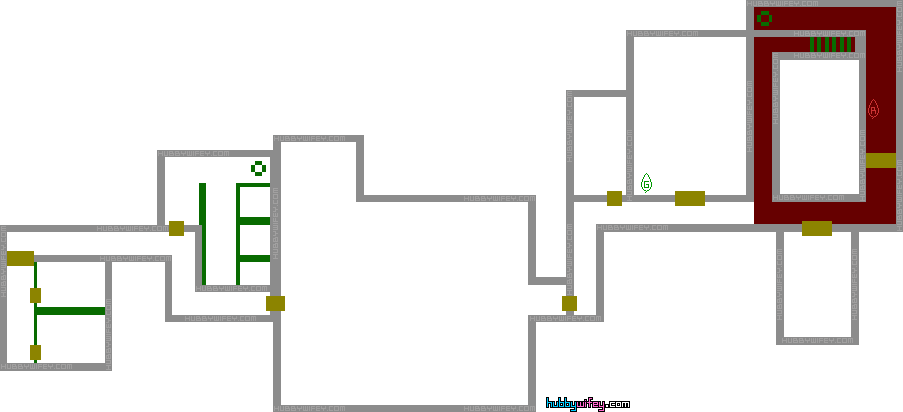 Sewage Disposal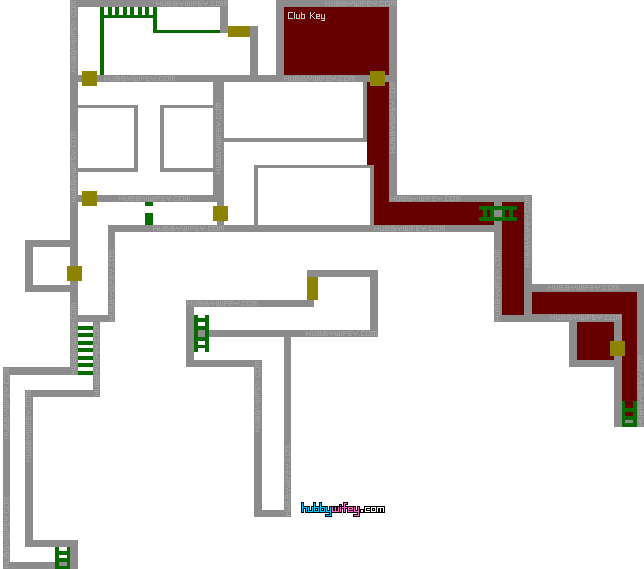 43. As Sherry: Solve puzzle, grab Club Key and go back to original position. 44. As Claire: Take Club Key. Go back into Storeroom Right. Time to retire the Bow Gun (good riddance!) and Hand Gun permanently.
Equip *only*:
a. GRENADE LAUNCHER + ALL ROUNDS b. CLUB KEY c. DIAMOND KEY d. LIGHTER 45. SAVE GAME! Basement (Pt 2) 46. Go back up to Basement. Kill Licker(s) in the way. Exit back to staircase. Police Station 1F (Pt 5)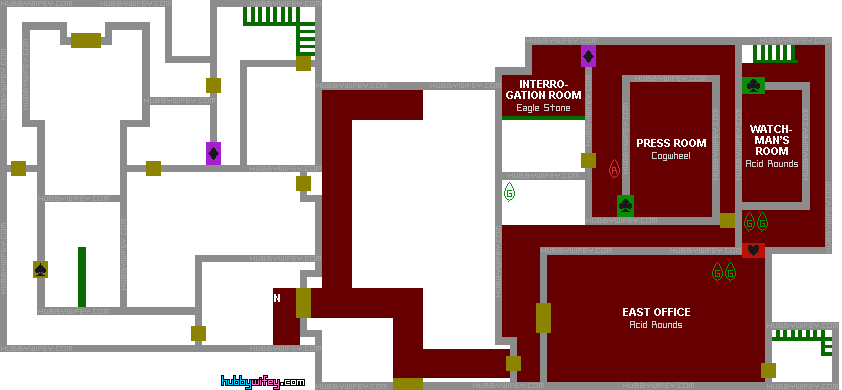 48. Head back to East Office. On the way, take and combine 2 Gs to save space. 49. Go Lobby Corridor. Waste zombies with Grenade Launcher. Take 1 G. 50. Go Interrogation Room. Kill zombies in the way. Take Eagle Stone. 51. Go Press Room. Kill Licker. Light up 12, 13, 11. Take Cogwheel. 52. Outside Press Room, take 1 R if there's space. 53. Head to Main Hall. Go Reception Room.
Equip *only*:
a. GRENADE LAUNCHER + ALL ROUNDS b. BLUE STONE c. EAGLE STONE d. SQUARE CRANK e. COGWHEEL 54. Go Emergency Ladder. Ascend. Ignore Licker. Go Library. Police Station 2F (Pt 4)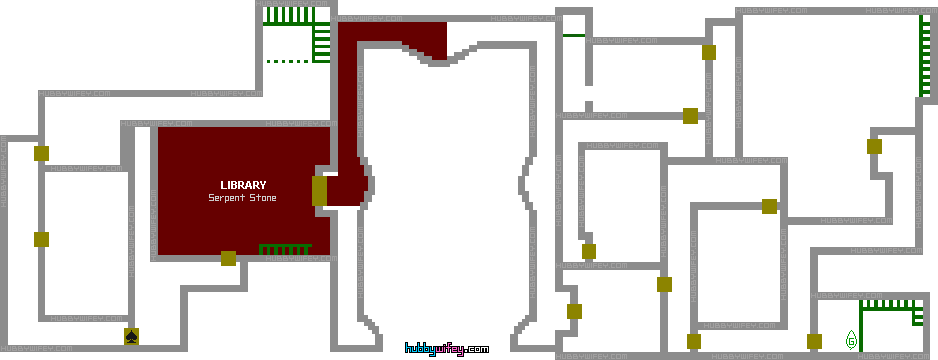 Police Station 3F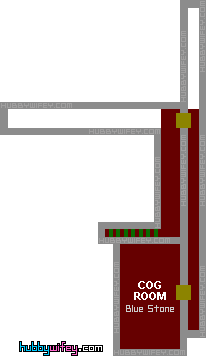 57. Inside Cog Room, use Square Crank and Cogwheel. Take Blue Stone. Combine with other Blue Stone. Police Station 2F (Pt 5)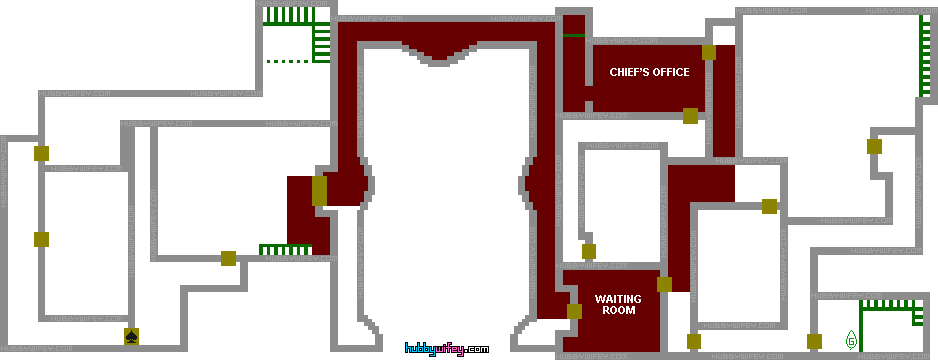
Equip *only*:
a. GRENADE LAUNCHER + ALL ROUNDS b. JAGUAR STONE c. EAGLE STONE d. SERPENT STONE e. Two 3xGs 59. SAVE GAME! 60. Go Chief's Office. Use Stones and solve Painting Puzzle. Sewer B1 (Pt 1)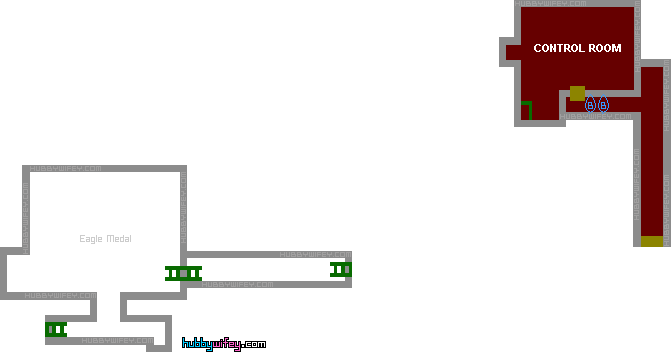
Equip *only*:
a. GRENADE LAUNCHER + ALL ROUNDS b. VALVE HANDLE 67. Go down Warehouse. Avoid zombie. Take Grenade Rounds. Climb back up. Sewer B2 (Pt 1)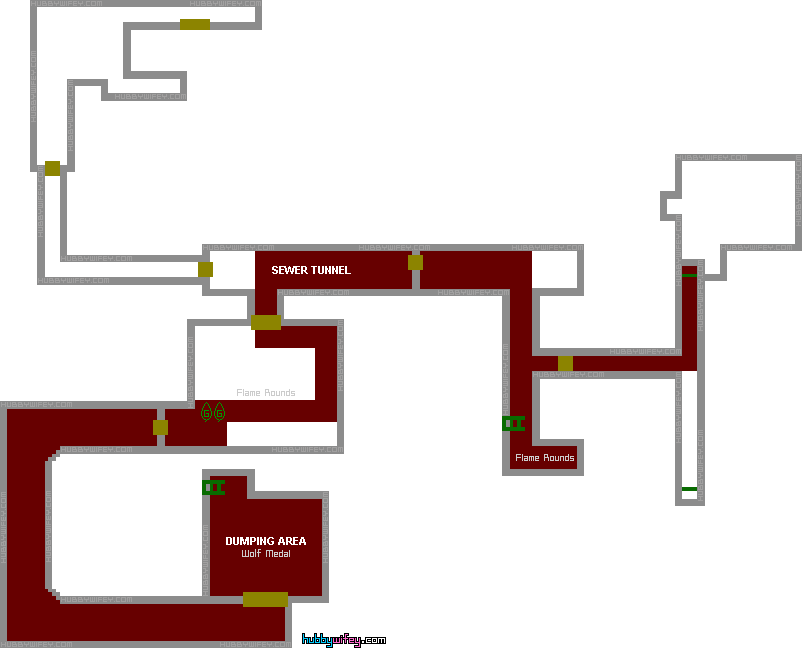 70. Go to Water Pool. Use Valve Handle to lower bridge. 71. Cross bridge. Use Valve Handle again to raise bridge. Take Flame Rounds and 2 Gs. Combine to save space. 72. Go Dumping Area. Hi Alligator! Retreat and kill advancing Alligator. 73. Back into Dumping Area. Take Wolf Medal. Sewer B1 (Pt 2)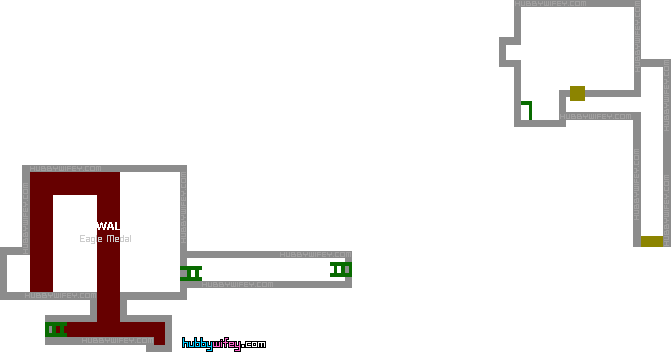 Sewer B2 (Pt 2)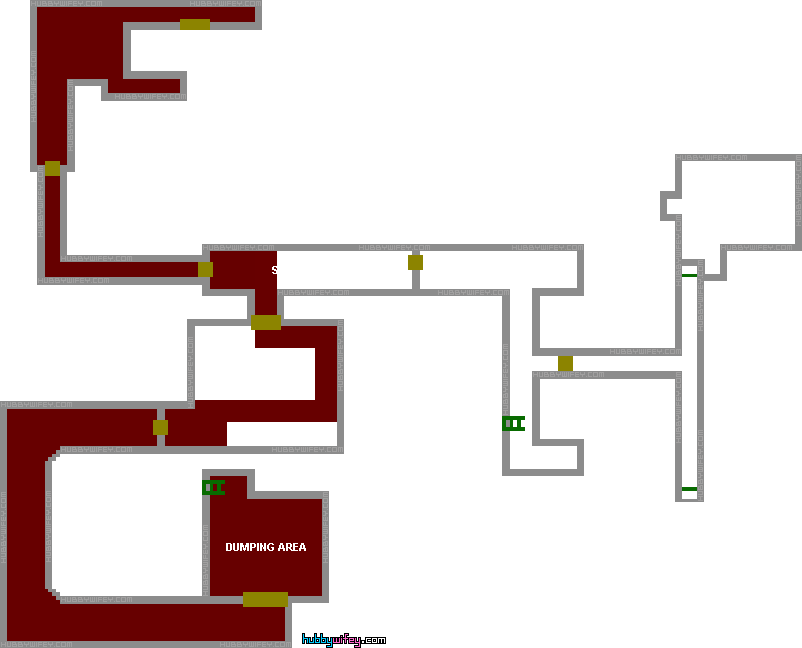 76. Cross bridge. Go Sewer Tunnel. Use both Wolf and Eagle Medal. 77. Follow corridor. Summon Tram. Vacant Factory B1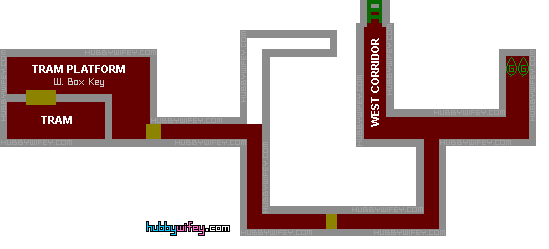 79. Go East Corridor. Clear zombies with Grenade/Flame Rounds. Take 2 Gs. Combine to make 3xG. 80. Go West Corridor. Ascend ladder. Vacant Factory 1F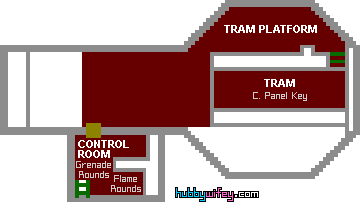
Equip *only*:
a. GRENADE LAUNCHER + ALL ROUNDS b. Two Gs / RGBs (whichever is available) 82. SAVE GAME! 83. Go into Tram. Go toilet. Take Flame Rounds. Laboratory B4 (Pt 1)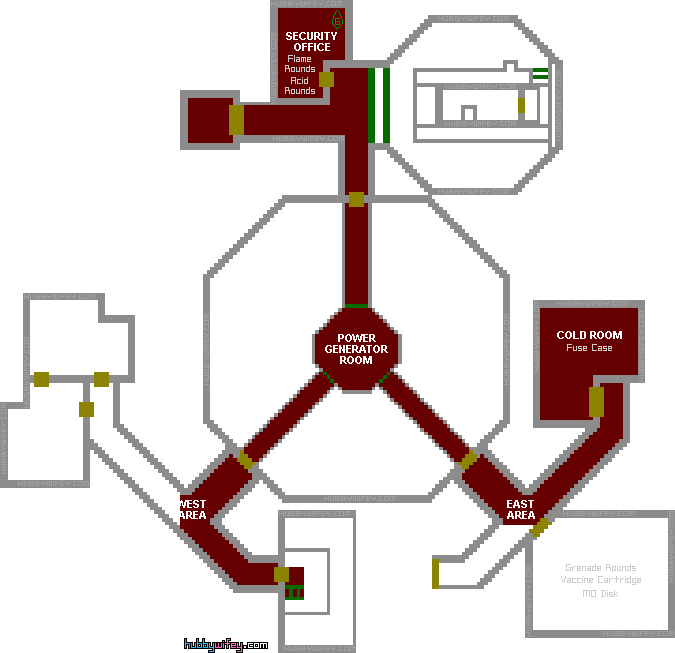
Equip *only*:
a. GRENADE LAUNCHER + ALL ROUNDS b. One 3xG 88. SAVE GAME! 89. Go Blue doorway (East Area). Laboratory B5 (Pt 1)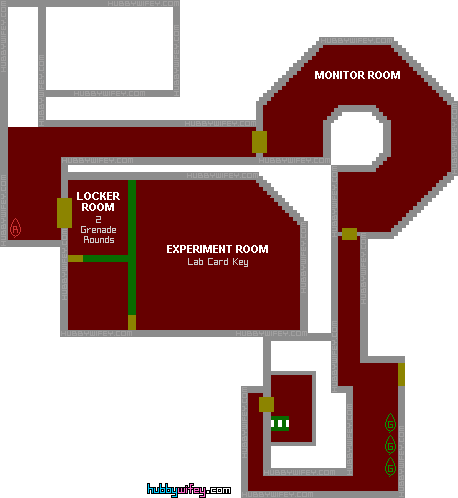
Equip *only*:
a. GRENADE LAUNCHER + ALL ROUNDS b. W. BOX KEY c. One 3xG 95. Go Locker Room. Use W. Box Key. Take 2 Grenade Rounds. 98. SAVE GAME! Laboratory B4 (Pt 2)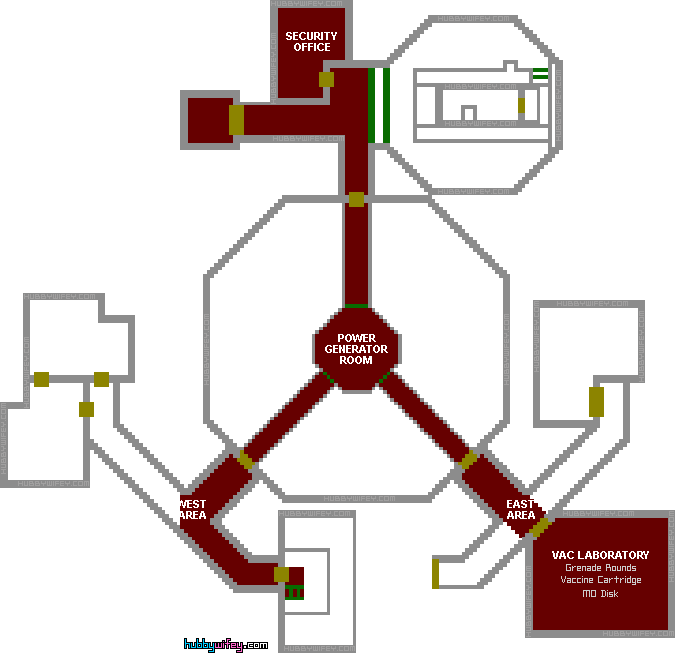 99. Backtrack to upstairs. Go Blue doorway (East Area) to VAC Laboratory. Laboratory B5 (Pt 2)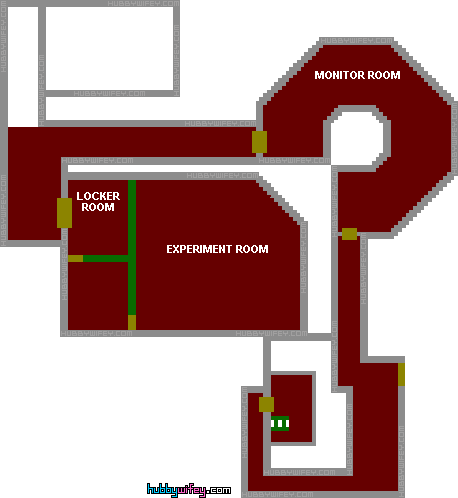 104. Go Experiment Room. Use Base Vaccine with Vaccine Synthesis Machine. Take Vaccine. Go back to Monitor Room. 105. At Monitor Room,
Equip *only*:
a. GRENADE LAUNCHER + ALL ROUNDS b. ANY 3xGs and RGBs YOU HAVE / CAN MAKE! FILL UP YOUR INVENTORY. 106. SAVE GAME FOR THE LAST TIME! 107. Backtrack to Biohazard Corridor. Go through doors. Activate Platform Elevator. Congratulations!! & Your Reward... if you did it right that is... :) 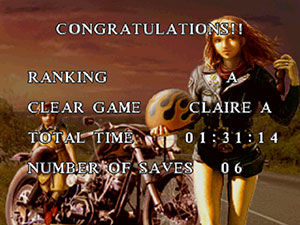 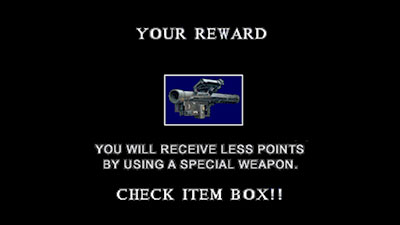 Sources: |
|||||||
| Copyright ©2020 hubbywifey.com. All Rights Reserved. |